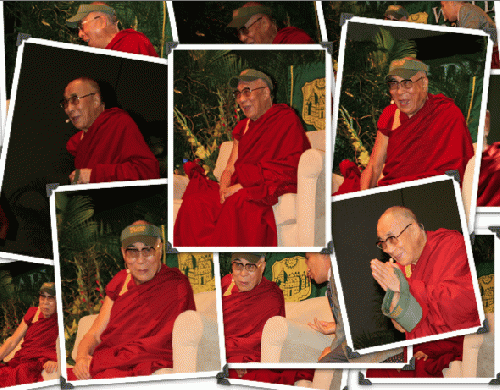
In 2010, I attended one of His Holiness' events at the College of William and Mary in Williamsburg, Virginia. I sat front row and center, just six or seven feet from him, bathed in his aura. It was a magical experience to be enveloped in the essence of his joy. And due to attending on a press pass, I was allowed to take photos, which provided indispensable reference material for this piece of art as well as for my OpEdNews article, The Dalai Lama Speaks on Compassion, Peace, and Enlightened Thought.
One of those treasured photos shows him looking right at me. The feeling I had in that moment of being enveloped in such deep joy and warmth and kindness, is the feeling I wanted to capture in my art in order to share it with others.
I used hundreds of photos for reference, and watched the award-winning DVD, Dalai Lama Renaissance, many times, for inspiration and in order to carefully develop the likeness. My art teacher, who studied with Norman Rockwell, had always taught us, "When you draw the front, think side. When you draw the side, think front." One single flat photo can't capture the essence of a person the way that a portrait can, since a portrait artist can include characteristic subtleties from a variety of views that add up to a richer expression of the essence of the person portrayed.
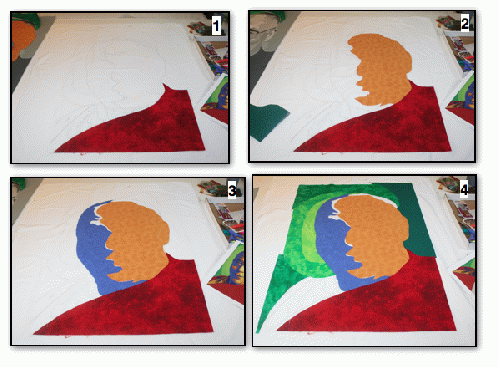
The technique used in the portrait portion of this piece of art is "Textile Pointillism," a method I devised after developing an allergy to oil paint. It is based on aspects of art that I have always loved: the foundational methods of the Old Masters, including classical techniques of perspective, value and color, and the uninhibited brushwork of the French and American Impressionists. My method is executed with small, fabric "brushstrokes" which have been carefully cut and placed in order to create detail on top of large areas of color. Then a variety of different threads are stitched on top to create the illusion of blending:
1. Slightly sticky webbing is adhered to the back of each piece of fabric. This makes the fabric act like a post-it note...it will stay where you put it, but it can still be repositioned until it has been heat-fused. I drew guidelines on the piece of white backing fabric. Then I position the first piece of fabric --I usually start with one of the largest pieces first. (Note my artist's color sketch on the right side of the photo, which I use at this stage as a guide in selecting the colors of the fabrics.)
2. The lighter portion of the head is positioned. (To the left is a full-sized image of the portrait in grey values, which I use at this stage to guide the size and shapes of each piece.)
3. The shadow portion of the head is positioned
4. The background pieces are added.
Next Page 1 | 2 | 3 | 4 | 5 | 6 | 7 | 8 | 9 | 10
(Note: You can view every article as one long page if you sign up as an Advocate Member, or higher).


